
 When you see this symbol, click to read related discussion in the Forum. When you see this symbol, click to read related discussion in the Forum.
Yeah, that's right. It's May 33rd. I just can't deal with the idea of it being June already. Time is zooming by way too fast. I don't know if I've officially said this on the site, but I really want to finish the addition by Labor Day.
Stop laughing. It could happen. It's still only May, after all.
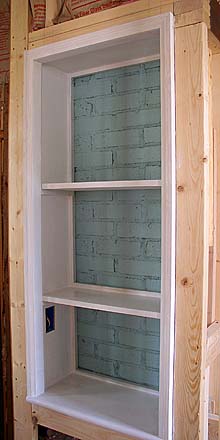
I built in this little open shelving cabinet in William's bathroom. It's getting really hard to take photos in there because the room's so small but, for reference, the brick in the back of the shelf is the funky chimney stack that runs up through the bathroom. We wanted to leave a little of that peeking through. (I thought I had posted a sketch of William's bathroom design a long time ago, but I can't seem to find it on the site. I'll have to see if I can find the actual sketch and get it on here.)
Also installed the bed moulding on the upstairs screened porch, but I'll spare you yet another photo of that space. The only thing left to do out there is add pickets to meet code. We're exploring some different design options for these.
We've nailed down the colors of most of the interior trim now and Gay picked up a lot of the paint today. The trim all needs to be painted before the plasterer can start...at least the outside edges that meet the plaster. -- Bill
Hey, our dog has a talent! She kayaks.

We discovered this last week when I put her in my kayak and then she scrambled up onto the bow and stood there like a figurehead. She's goofy.
Today was a painting day. I put the top coat of paint on the siding above the back porch.
While we're on that subject, I'm going to share one of my million-dollar inventions with you.
Often I find myself painting while standing on a porch roof with a shallow slope. The challenge is what to do with the paint can so that it's not sitting at an angle. A couple years ago I took a plastic gallon tub and used a PVC saw to cut the bottom off at an angle that matched the roof slope. Then I snug the paint can down in it and, viola, the can sits level on the roof.
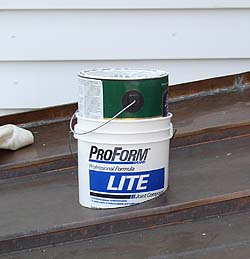
Dandy, eh? (Patent Pending! You can make your own, or buy mine in your neighborhood paint store...some day.)
William's still plugging away...sporadically...with less vim and vigor than before...on priming the law office.
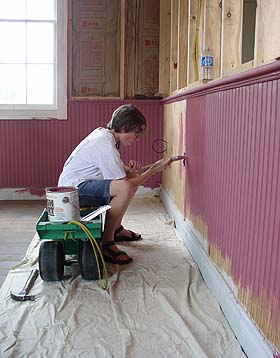
He's finding it to be a bigger job than he first thought. He primed about six feet today because he decided it was better than studying for his exams.
The color that he has selected for his beadboard made me go all Ron Weasley and exclaim, "Bloody hell!" when I first saw it on the wall the other day.
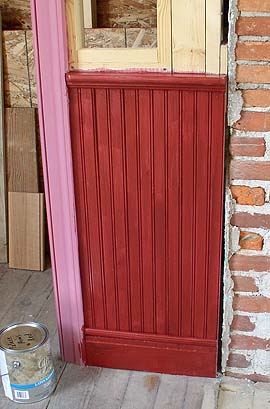
Palace Arms Red. Zowie. I'd never be able to get to sleep. Or if I did, I'd wake up angry.
Gay started adding some color to our bedroom trim.
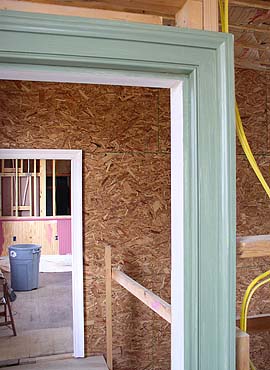
Ahhh...isn't that better? Much more soothing. Thomas Everard Olive.
Speaking of colors...we decided to paint the porch floors the same color that we had selected for the sills. Chownings Tavern Rose Tan.
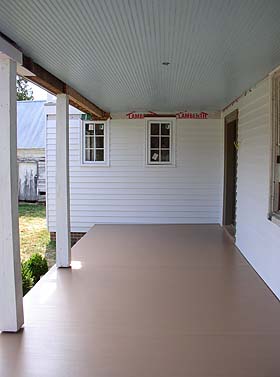
I'm really diggin' this color because it's very neutral. Your brain really reads it as "wood" and kind of ignores it. So it doesn't compete with anything else.
And speaking of the porches...looks like they're going to be at a standstill again this week. I received my 33 replacement boards on Friday and promptly rejected 21 of them. No kidding, they were much worse than the worst of the first batch! Well, I'll just keep playing the game until I get enough usable boards to finish the porches without compromising on quality, or sacrificing our bare feet. Trouble is, I won't be able to get another batch until this Friday. Oy. -- Bill
Today marks one year since we broke ground on the addition. One whole year.
Watching this anniversary approach on the calendar I had considered devoting today's journal entry to a rant about our mason and how he started our foundation a year ago today, and then took nine friggin' weeks to finish it. Nine weeks, when it should have taken no more than three.
Of course, he's not the reason that we're still not finished. But he sure didn't get us off to a rolling start.
So, I'll cut that rant short and instead share some random thoughts about this past year's experience. In no particular order.
- My wife and son have amazingly elastic patience. Troopers all the way. I couldn't imagine carrying on each day, facing this mammoth job, without their help and support. I guess it helps that we're all on board with the mission.
- Our budget has been blown for months. You might remember that in the beginning I added a "Budget Tracker" to the site...and then at some point it just disappeared. Well, right around that time it became clear that there was no way in the world that we were going to be able to finish the addition within our budget.
- Where did I screw up the budget? One major area was trim. Knowing that I would be doing all of the trim work, I kind of treated trim as an incidental cost in my budgeting process. Boy, was that a mistake. I may be making a lot of the moulding, and supplying all of the labor, but the material costs are still very high. Hardly incidental. Really, I have been right on the money with all of the big budget items and have been fortunate to have very few (and relatively small) overcharges from subcontractors. It's the million small things (the "incidentals") that got me and blew the budget.
- Thanks to the house and my metabolism, I've lost 15 pounds that I didn't want to lose. I'll have to fight like crazy to keep from losing more over the coming hot summer. I guess I'll have to work on gaining it back when the house is done.
- I've found that nothing is as scary as it seems. I've had projects that I've dreaded because I wasn't quite sure how to approach them. In every case when I finally stop fretting and just dove in, they came together very nicely. I try to keep that in mind going forward.
- Gay wants to be a girl again and wear pretty clothes instead of grubby work clothes.
- Confession: I was never very fast at reading a tape measure...especially when it got down to 16ths. Now I can spot 11/16ths on a tape measure from across the room. And I can add fractions a whole lot faster than I used to.
- I think Gay and I are allergic to cedar sawdust. She breaks out and I have major conjestion. We're quite the sight.
- To our friends and family, we've become one dimensional. All anybody knows to say to us is, "how's the house coming?" Enon Hall has become our identity. Partly, it's because of this Web site. And partly it's because Enon Hall really has consumed our lives for the last year. Not just our weekends, but every waking minute, six or seven days a week.
- I worry about the projects on the horizon. The kitchen quarters. The graveyard wall. The floor joists under the Dutch Colonial. They're all waiting for my attention. I hope they can hang in there.
- Sunday nights I have a real hard time getting to sleep.
- Hearing from folks in the Forum really does help keep me going.
- I wish the addition wasn't so big. But I still haven't thought of a better way to add the rooms that we needed without doing horrible things to the original part of the house. So big it is.
- The end result of our labor is going to be really fabulous. We still have the vision. We still get excited when we see bits and pieces coming together and see that it really does look like that picture we've been carrying in our heads. We just can't wait to see it all done.
- We've always been a close little family. This experience has brought us even closer together. I'm so glad that I can say that. Because not every family would be able to say the same.
- Our stuff's been in storage for 14 months. I miss our leather sofa. I miss my ancient (24 years old), thread-bare John Prine concert t-shirt. I miss real eating utensils. William misses a lot of his books (many came with us). I miss our art. Gay misses it all.
- Every day we're one day closer to seeing it done. Very cool.
Now, back to work.  -- Bill -- Bill
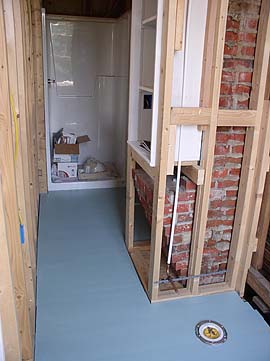
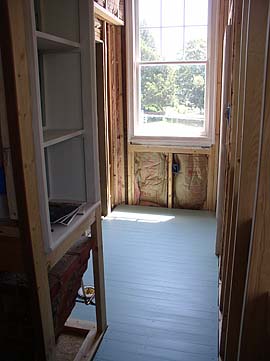
I've spent the last couple days installing the painted wood floor in William's bathroom. I started by laying down 15 pound felt paper and using chalk to mark the location of the joists below for nailing. I also marked my "no nail zones" where drainpipes crossed through joists. (I referred to photos that I had taken before I put the subfloor down to refresh my memory about where the pipes ran.)
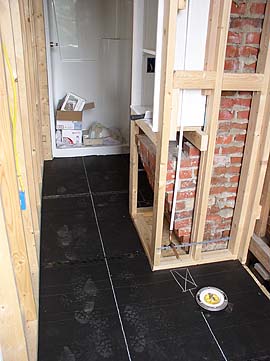
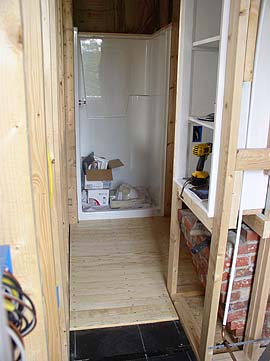
I used 4-inch tongue & groove boards and face nailed them on the tongue side of each board for effect.
Primed and with one coat of floor enamel, it looks pretty good. You have to be careful with painted floors in bathrooms because a lot of the floor enamels can be very slick when wet. Lowe's American Tradition line has a satin latex floor enamel that has a very low sheen. Of course, ventilation is also important when you have wood floors in a full bath. We've installed the strongest exhaust fan we could find and the room also has a large window.
Meanwhile, Gay started painting the trim in the master bath.
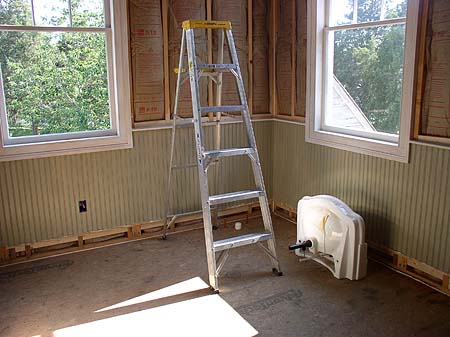
Our tile installer is supposed to start working on our master shower on Monday! Will be nice to have somebody else in the house working. -- Bill
William and I spent Thursday, Friday and some of Saturday working on his new bathroom. With the floor down we started work on the walls.
The bathroom had two doorways into the adjoining room in the Dutch Colonial. The door closest to the new shower was the old access to the law office. The second doorway was for a closet, accessed from the Dutch Colonial side, that we removed. The doorway closest to the shower has a jamb that is about 12 inches thick because it's actually going through two abutting exterior walls. The other doorway is only one wall thickness; the second wall having been removed when the closet was added sometime in the mid-20th century.
All this to say that we wanted to do away with the doorway by the shower and keep the other, giving access to this bathroom from the rooms on either side. Long ago I had thought that because of the deep jamb, this would actually make a handy little closet for the room on the other side of the wall...if I didn't have to eat up too much of the depth with framing. Instead I decided to cover this wall with horizontal wood panelling. I actually used 6" tongue & groove pine floor boards and yes, I face nailed them with cut nails.
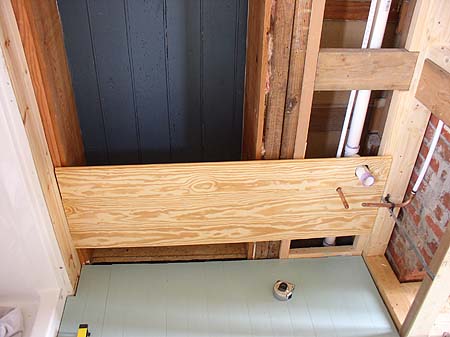
The 3/4" boards were able to span the doorway without any additional support because the tongues & grooves stiffened them up nicely. The other side of the boards will be the back wall of the new closet.
Everybody came to check out the disappearing doorway.
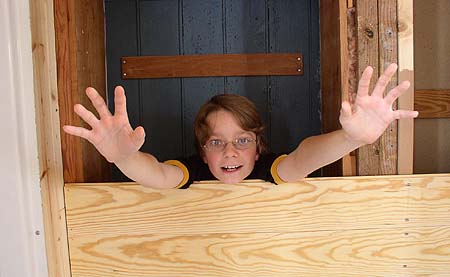
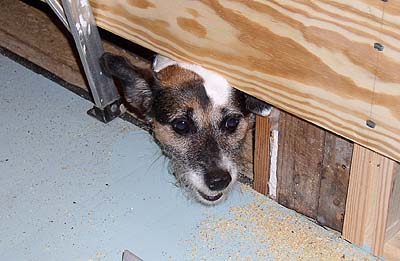
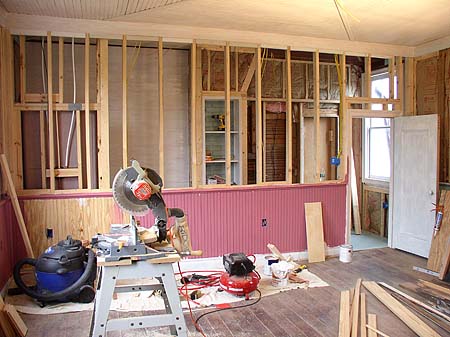
It didn't take long before the door was gone. You can see the new "boarded up" and primed wall on the left in the photo below. To the far right you can see the other door, which has been boarded up since before construction began.
And on the other side of the wall we now have a new, badly needed, storage space!
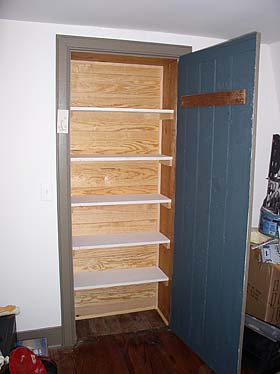
This room will be Gay's sewing room so all of those shelves will come in handy for fabric storage.
I was surprised that the 3/4" thickness of wood actually provides a better-than-expected sound barrier. I had already warned William that he might not want to sing too loudly in his new shower, but we found that it was a lot more soundproof than I anticipated. And it will be even more so when the closet is loaded with fabric and the door is shut.
The next morning I removed the plywood nailed over the other doorway. It was really fun to suddenly see light from the new bathroom window streaming into the room on the Dutch Colonial side, and to check out the never-before-seen view from the other side.
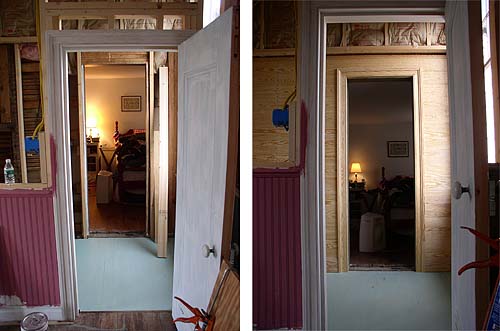
By that afternoon, that wall was panelled and the doorway was trimmed out, including a jamb extension that I had to add.
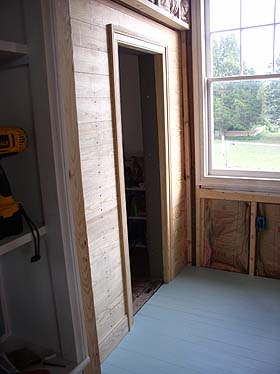
I mentioned that "William and I" worked on this project. His job was aging the boards. He eased the edges on every single board so that the joints would be more visible and then added some subtle "character features." He did a really nice job and it makes all the difference in the world. He appreciated the fact that the key was not going overboard. He explained to me that it's like a quote he had read about being good actor. "Don't act like a drunk man. Act like a drunk man trying hard to be sober."

His only indulgence was scratching his initials into one the boards. (One that will be at eye level when seated on the toilet.) My first reaction was that he had gone too far, but I quickly changed my mind. It's a testament to this being a generational family home. We're all leaving our marks in one way or another. I told him, "You know, if you had done that somewhere in our old house it would have been really bad. But here...here it's perfectly appropriate." For the same reason that we've never painted over all the phone numbers that the previous owner scrawled on the wall downstairs in his old age. It's history.
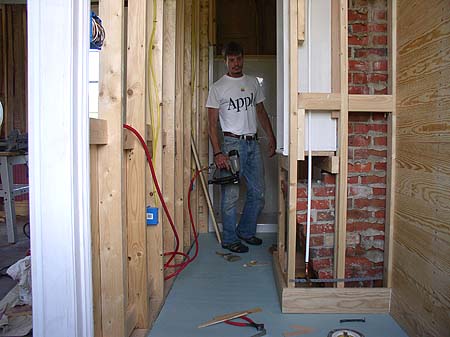
The following morning, I installed the baseboard on the other walls that will be plastered and finished up some other details, like adding missing nailers over the shower. I will be glad to move on to another project after being confined in this tiny space for most of the week. I'm really impressed with how the painted floor held up during the wall construction. I wasn't really trying to keep it pristine because it will get a second coat after the plasterer is done, but it only suffered one small ding in the process. I guess that's the secret...not caring. -- Bill
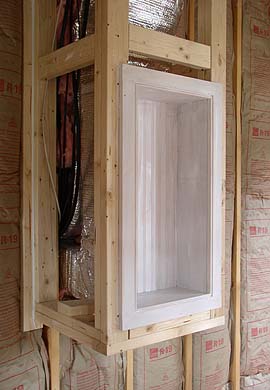
The front of this HVAC duct chase in the master closet had a little dead space, so I built this cabinet to fill it. Not sure exactly what it's use will be, or whether it will have doors, but just couldn't let that space go to waste.
We're actually down to working from a punchlist of items that we have to complete before the plasterer can start. That means it's actually a finite number of things to do! What a great feeling!
Other than priming and painting (which is in various stages of completion all around the addition) here is the punch list:
William's Bathroom - Complete!
Law Office (William's Bedroom) - Complete!
Upstairs Hall
- Trim out second-floor edge around staircase
Master Bedroom
- Frame partition walls on either side of fireplace
- Laundry chute
Cabinet for duct chase - Complete!
- Replace one twisted stud
- Nailers above and below ironing board
Master Bath
- Tile shower (Supposed to start tomorrow)
- Finish beadboard and cap once tile is done
- Install baseboard in toilet room
Downstairs Hall
- Cut through door to dining room and trim out
Family Room
- Frame partition walls on either side of fireplace
Kitchen
- Install one can light
- Shove steel wool into any open holes in wall base plates and caulk (Mouse proofing)
Pantry
- Build door jamb and trim out
Laundry Room
- Laundry chute
- Order pocket door hardware and install door
- Trim doorway
Guest Bath
- Build door jamb and trim out
Back Hall
- Order and install fire-rated door to garage
- Stair trim - Need to figure out what I'm doing here
- Door to room above the garage - Need one
Regarding the laundry chute, I E-mailed our building inspector today to find out if there are any code issues I needed to be aware of and he replied, "Single dwelling units are exempt from requirements pertaining to laundry chutes." Well, that certainly makes things easy! -- Bill
We're plugging away, ticking items off of the punchlist.
The tile guys got started yesterday afternoon and boy, have they moved fast!
The backerboard went down in the colonnade in short order, as well as in the master shower.
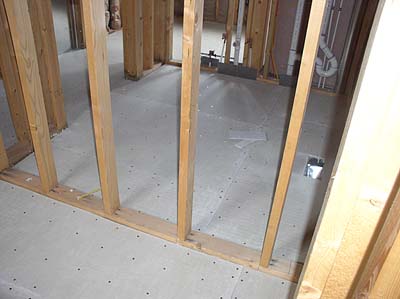
In the photo above, the pantry is in the foreground (in front of the stud wall), the laundry room is next and the guest bath is in the very back.
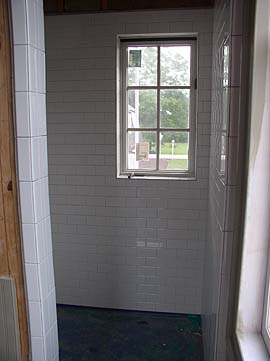
By the end of the day today, the shower walls were completely tiled, but not grouted.
Today, William and I started work on the...
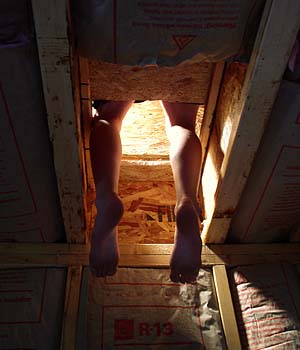
laundry chute! More on this project tomorrow when it's (fingers crossed) completed. -- Bill
The laundry chute is in!
This item has been on our dream list ever since we started talking about building the addition. We had the architect line up the second floor master closet and the first floor laundry room for this sole purpose.
There's nothing very difficult about this project, especially if you're working in new construction, and especially when it's a straight shot.
Taking the lead of the folks at House In Progress I was going to use melamine because of its very slick surface. (The problem you hear most about laundry chutes is clothes getting hung on splinters, uneven joints, etc.) So the other night I took all the seats out of the truck...I mean...van and headed 40 minutes away to the nearest Lowe's. Everybody there looked at me like I was an alien when I asked for melamine. Funny, the Lowe's guy I had talked to on the phone before making the trip seemed to know what it was and said they had 4' X 8' sheets in stock. Not so.
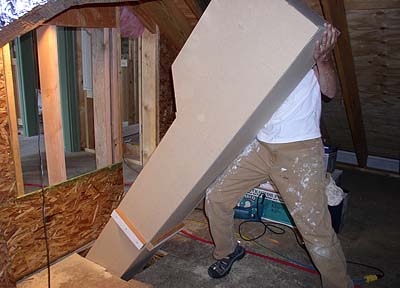
Plan B was 3/4" MDF. (Heavy as lead.) Which brings me to another complaint. What's with these sheet products going to 49" X 97" now??? Most vans are designed to exactly accommodate a 4' X 8' sheet of plywood with the seats removed. Now they're adding an inch in both directions so that you can't close the hatch!! Grrr.
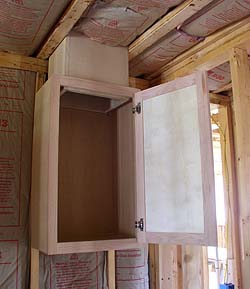
Anyway, I bought the MDF (2 @ $19) and an unfinished 18" upper cabinet ($56).
I started the day yesterday by establishing the location of the hole in the ceiling and then determining that I was going to need to cut a stud in the upstairs wall in order to get everything to line up. I cut out the stud and put in an overkill header. This was probably totally unecessary since this is a gable end wall, but it made me feel better.
With the wall prepped, I started laying out my chute pieces. The size of our chute was determined by the amount of space between the floor joists (13-1/4") and the depth of the cabinet that would receive the clothes downstairs (10-1/2"). My design is just a 78" X 13" X 10-1/4" box with a sloped opening at the top.
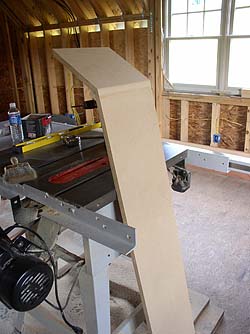
I assembled this piece first and rounded the transition with a little sanding. (Note: cutting MDF kicks up a huge amount of dust. You'll want to wear a respirator.)
This morning I assembled the rest of the chute. After mulling on fasteners overnight, I finally decided to just glue and nail. Driving screws in the side of MDF isn't great because it causes the material to swell unless you drill a very large pilot hole. The other option was using dowels to put it all together and, frankly, that just seemed too "Norm Abrams" for a project that will live its life behind the wall, unseen. So I glued and used the trim nailer to shoot in nails about every six inches, holding my breath with each nail and hoping none would decide to pop out inside the chute. None did. The end result is plenty tight and strong.
Finally it was time to erect the chute. I attached cleats to the sides of the chute at my desired floor level so that the chute wouldn't just fall right through my hole when I raised it. I wound up having to cut my hole in the subfloor a little larger so that I had room to angle the chute all the way up. Once the chute was in, I re-covered the excess hole and drove a couple screws through the cleats into the floor.
Downstairs, I cut a hole in the top of the cabinet to receive the chute and mounted the cabinet on the wall. I'll need to add nailers to each side for the blueboard and then we'll just plaster right up to the cabinet.
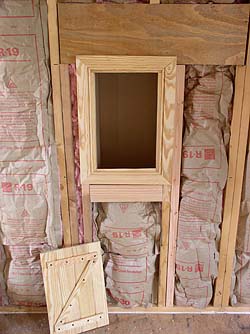
Upstairs, in the closet, I trimmed out the face of the hole and made a simple board & batten door that will just hinge on the side.
And the backside in the attic...
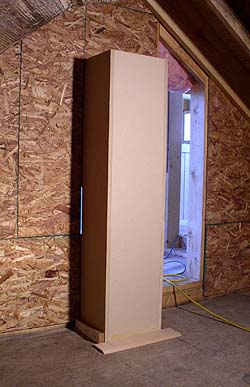
And here's the beauty shot...
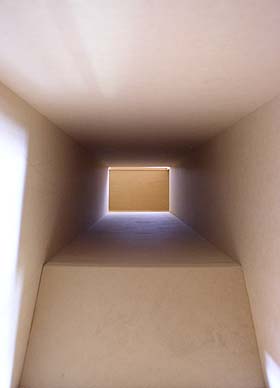
7.2 cubic feet of super-smooth-one-way-dirty-laundry-rapid-transport-and-short-term-storage. Not bad for under $100 in materials and about a day and a half of work.
Oh, MDF doesn't like moisture. Our house rule will be no wet towels/bathing suits, etc in the chute. (Not that you would want to do that anyway because of mildew.)
Speaking of wet towels, the shower is looking awesome. (I wish I could use it!) -- Bill
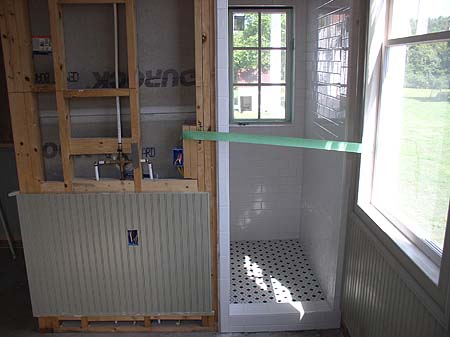
A guy's motto:
Everything has a use for which it wasn't intended that's much more fun than its intended use.
Happy Father's Day! -- Bill
Today I hung the pocket door door for the laundry room downstairs. This was actually a pretty fun project.
I ordered my track and hardware last week and it arrived yesterday, just in time.
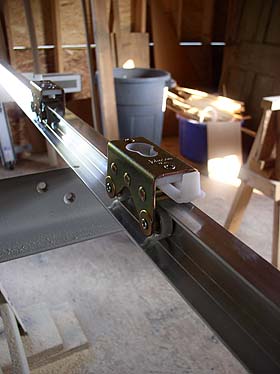
It's a pretty nifty system. The photo above shows everything upside down, but you can see the main components...the extruded aluminum track and the trucks that hang from the track. The two pieces of hardware that screw to the top of the door each have a pin that fits up into the hole in the bottom of a truck and then gets locked into place by sliding over the white lever. It's really very simple and I had the door hanging in about 30 minutes, including cutting the track down to the size I needed.
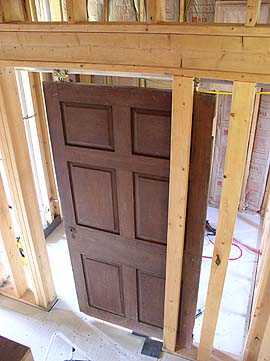
After that, it's just a matter of trimming everything out to hide the track and case the door.
The only thing that I didn't like was the plastic guides that they provided with the hardware. They're supposed to be mounted to the bottom edge of the trim to keep the hanging door centered in the opening. They looked pretty cheesy. Instead, I went to the hardware store and bought these rollers (intended for the top of bi-fold doors) and installed them inside the wall where they will never be seen. The operation is smooth as silk!

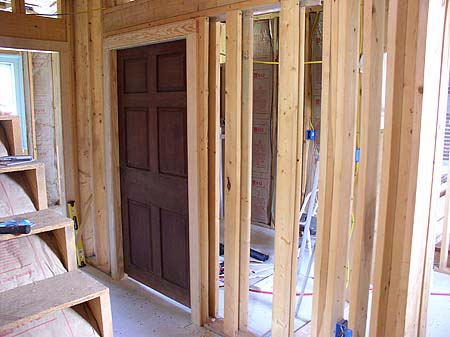
It's all done except for the rake moulding that goes around the outside edge. (I need to find time to make a trip to Richmond to pick up an order of rake that's been waiting for me for a couple weeks now.)
The door that I used is just another from the chicken house collection. Any door can be used as a pocket door.
For Father's Day I got this whacky fruit tree.

It's called a "Fruit Cocktail Tree" and is supposed to bear peaches, nectarines, apricots, and plums...all on one tree. (But don't you need pineapple too for fruit cocktail? Now THAT would be a trick!) 
Sheesh...I CANNOT believe how fast June is rolling by!!!! -- Bill
Yet another reason to gripe about our mason...
In addition to the 20' X 20' sandbox that he left in the front yard, he also left a 50-pound bag of mortar lying on the floor in the hall. It's been there ever since he finished the chimney. Today, I was doing some cleaning up and decided it was finally time to haul the fragile-looking bag out to the dumpster. I gingerly carried it through the house, feeling that it was about to split in two and dump its contents everywhere. Luckily I made it out to the dumpster, leaving only a dusty trail in my wake. All that was left was to lift it up over my head to chuck it in. That's when it split wide open. Over my head. I hate that guy.
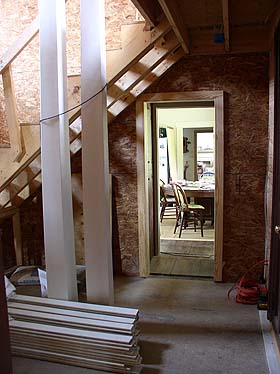
Yesterday I opened up the doorway from the new center hall into the 1850s dining room, presently our kitchen. It was exciting to get this glimpse of the future! I tore out the 1950s jamb (last remnant of the '50s kitchen), built a new jamb, and trimmed it out. Then I closed it back up with a sheet of plywood to continue to keep the dust out of our living space.
Those are the two new tapered posts that will go on the front porch, as well as the floor boards for the porch. I'm still waiting for my 21 replacement boards from about 3 weeks ago. -- Bill
We bought two pieces of granite to use as steps for the back porch. They are actually old pieces of curbing from Richmond's Jackson Ward.
We had a local gentleman (Mr. Curry) go pick them up and then help us place them. At about 1,500 pounds each, this is not something you can do without the help of a forklift.
Here he lifted one of the pieces up into the air so we could decide which side would be up, etc.
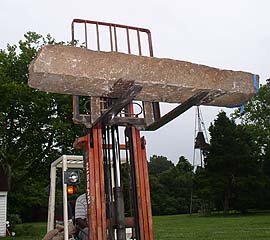
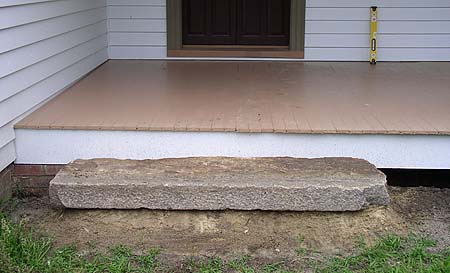
After Mr. Curry had left, we decided we aren't totally happy with the placement of the stones and will probably be taking him up on his kind offer to come back and make adjustments, if needed. "Just call me. Don't go doing the kind of stupid thing that only somebody your age would attempt and somebody my age would never think of," he said. Boy, he has me pegged pretty well. Think he heard about my attempt to lubricate the windmill with a Super Soaker filled with WD-40?
Meanwhile, I have babies in my workshop.

It's not a great picture, but the best I could get for now. How the heck is mama gonna teach them to fly in the house? And then teach them to fly OUT of the house.
As with the rest of the east coast, it's been raining like crazy here so I haven't been able to work on the porches. So I cut William a break and primed and painted the law office ceiling.
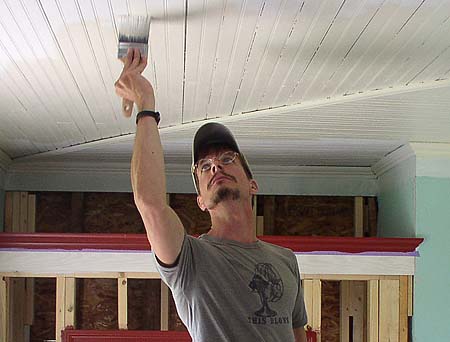

Purty, eh? It wasn't nearly the awful job that I expected it to be. I used Kilz for the first coat to cover old stains. That took the better part of a day. The final coat only took about four hours.
I talked to the plasterer Monday night and he says that we're next on his list! The bad news is that he thinks it will be a month before he can get started. And then a month to finish the work. That will put us at Labor Day. So much for having the addition finished by Labor Day. Once he's done, we'll still have floors, stairs, and the kitchen to complete.
Planted two new trees that we got in Williamsburg this weekend...a Catalpa and a Chaste Tree. -- Bill
|  When you see this symbol, click to read related discussion in the Forum.
  -- Bill


