
 When you see this symbol, click to read related discussion in the Forum. When you see this symbol, click to read related discussion in the Forum.
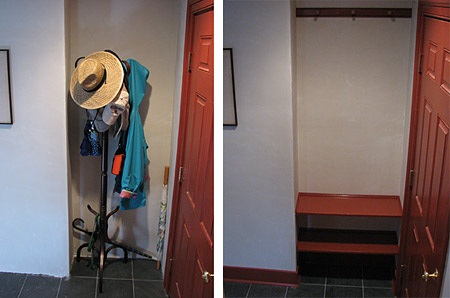
In my last post I mentioned our hall tree in the back hall beside the garage door. An eyesore to be sure, but serving a purpose. The tree sat in a little niche that was destined for some kind of built-in coat and shoe storage.
I had considered some kind of cabinet with doors, but decided to just keep it simple. A peg rail up top for hanging coats and two shelves below for shoes and other junk.
A while back we had found some pegs that the previous owner had made and we used all of them in the center hall. So I made some more to match them.
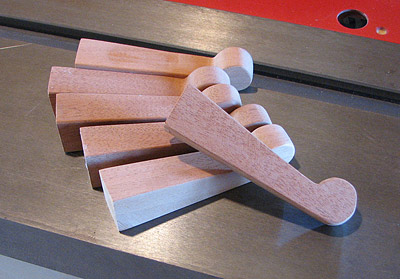
They're different from the knob-headed shaker pegs. I like the look of these better. I made these from some scrap mahogany and then used a dowel and glue to install them in the rail.
Speaking of pegs... I installed pegboard in the garage today.
Oy! The Northern Neck is infested with fruit flies! We've been dealing with them for weeks now and they're everywhere you go. They're small enough to fly right through the window screens. We need a freeze!  -- Bill -- Bill
Today I had to drive 150 miles to get 23/32nds of an inch.
Tomorrow I'm going to start on the bookcases. I have a stack of 3/4" birch veneer plywood in the garage all ready to go. There has been some discussion about how to attach the shelves. I have looked at some options for making them adjustable, but finally decided to cut dados and permanently fix the location of the shelves. I'm going to have a mix of shelf heights: 10, 12, and 14 inches. Based on the bookcases in our old house, I think this will work out great.
An influencing factor in this decision was the fact that I couldn't get 1/4" birch veneer plywood locally. (And we're having a little bridge problem right now that is preventing trucks from easily reaching the Northern Neck with shipments.) So I went ahead and bought 3/4" birch plywood for the backs too. Yes, it's overkill (and heavy), but the bright side is that it will give me a good anchoring surface for the backs of the shelves without having to hit studs 72 times. (Yes, I counted.) So with the thick back stock I can just go ahead and cut a dado on all three sides and the shelves will be fully supported with no cleats, etc.
Cool!
Well, cool until I discovered that 3/4" plywood is actually 11/16" thick, so a 3/4" router bit is too big. Research revealed that there are "undersized plywood" router bits made especially for this purpose. Well, not on the Northern Neck there aren't. So I made a whirlwind trip to Richmond to pick up a 23/32" bit at Woodcraft. Otherwise I would have lost the whole weekend on this project.
So I'm all set now!
I think... -- Bill
After spending all day Saturday and all day Sunday helping me cut and route all the pieces for the bookcases, William decided that we should have named this site Cuttin' & Cussin'. Cuttinandcussin.com! A great domain for some new houseblogger!
Needless to say, it took a heckuva lot longer to get everything cut than I was expecting. A crappy old router was a contributor. Last week it crossed my mind that maybe I I should go on and get a new router instead of taking a chance on my inherited 25-year-old Craftsman. Sure enough, halfway through the day on Saturday it suddenly started spitting bits of broken metal out in protest. Not good. That put an abrupt end to work until I could get a new router this morning. And then I had to remake my jig because the base was a different size.

Anyway, all the parts and pieces are finally cut and ready for assembly. I sure couldn't have done it without William's help. He has Columbus Day off from school tomorrow, so maybe we can get them assembled! -- Bill
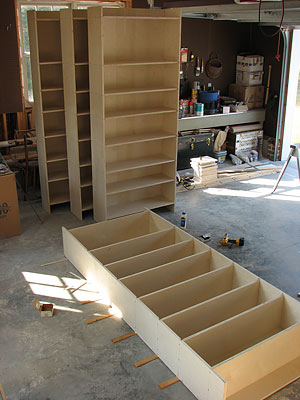
William and I had time to get four of the bookcases assembled today. Glued and screwed. They don't look like much right now, but the trim will really dress them up. And I have to add nosings to all of the shelves. -- Bill
More work on the bookcases this weekend. I assembled the last unit and then Gay and I primed and sanded all of the units while they were still in the garage.
We installed the center unit first so that we could make sure that it was in the exact center of the wall and then work out from it to the left and right.
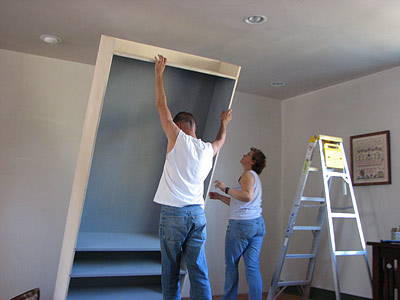
We only managed to get three of the units installed before we ran out of time today.
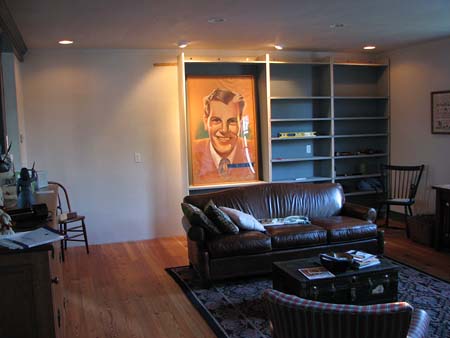
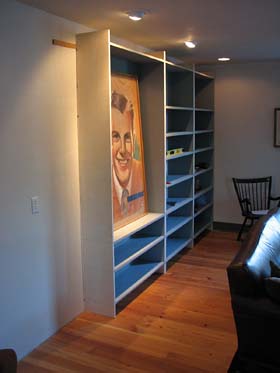
Right now it looks kind of contemporary, but the colonial trimwork will take care of that.
Each unit is anchored into studs at the top and bottom. Before I put on the baseboard I'm going to put a center support under each unit to give each of the bottom shelves even more protection against sagging. Especially the center unit where the shelf is 44 inches wide.
I'm afraid that the apron across the top of the cases is going to cast a deep shadow across the artwork so I think we're going to need to add some kind of lighting in the top of that center case.
Already we can see what a dramatic difference these bookcases are going to make in this room, making it much more warm and cozy! -- Bill
Today is Blog Action Day when over 14,000 bloggers are joining together to write about ways we can help our environment. Here's my contribution...
I used to be a diehard advocate of oil-based paints. But in recent years latex/acrylic paints have improved dramatically. I have even found the new acrylic primers to be fantastic, even on bare wood. Something you never would have attempted ten years ago. And acrylic primer dries in 1/10th of the time of a typical oil-based primer. The only downside is that water-based primers tend to raise the grain of your wood. But a quick, dusting swipe with 220-grit sandpaper takes care of that. We primed all five of our bookcase sections with acrylic primer yesterday morning. The sanding step took about a half hour and then we were ready to start installing the cases yesterday afternoon. If we had used oil primer we would have had to wait at least 24 hours before we could handle the bookcases. And the bonus...acrylic/latex paints and primers are much better for the environment. Oil-based paints are toxic and a lot of pollution is created during the manufacturing process. So...
Make your project go more quickly.
Make clean-up easier.
Make the environment cleaner.
Sounds like a win-win-win.
Happy Blog Action Day! -- Bill
Last weekend we were gone for three days to participate in the reenactment of the Battle of Cedar Creek. The weather was beautiful and we all had a great time. William had a tintype portrait made by Bob Szabo who does really nice work.
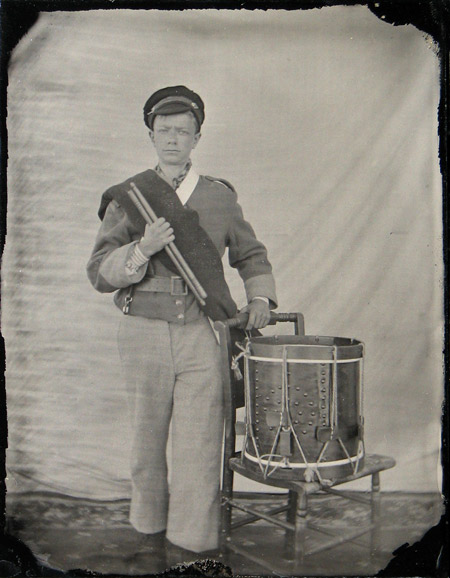
Anyway, the weekend was great. But it wasn't so great when we returned home late Sunday night to find water standing in the floor of the master bathroom, cupping the floor boards.
The culprit was a split nut on a compression fitting on the hot water line under Gay's sink.
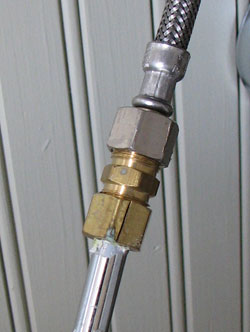
How the heck does this happen? Over-tightening? There is some discoloration of the nut that almost looks like heat damage. Could it have something to do with the hot water? Or maybe the nut was just defective. 
This is the second leak we have had in this bathroom now. Luckily this time the water didn't seep through to the kitchen ceiling below. A rug on the floor absorbed most of the water. We kept a fan blowing on the floor for 3 straight days and most of the cupping went out of the floor boards. With the rug back in place, you really can't tell anything ever happened. But what a pain! And why do these things always happen when you're out of town??!
We've been extremely busy so I haven't had time to work on the bookcases. I finally took some time to finish getting them all anchored in place today.

My new beading tool arrived today and the poplar I ordered for the trim should arrive tomorrow. So all I need is some more free time!
William has created a cool new Web site designed for kids interested in Civil War reenacting. Check it out. The Young Campaigner -- Bill
|  When you see this symbol, click to read related discussion in the Forum.


