
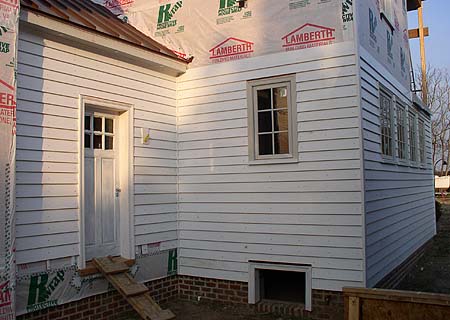
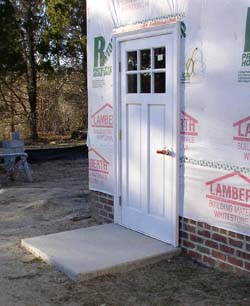
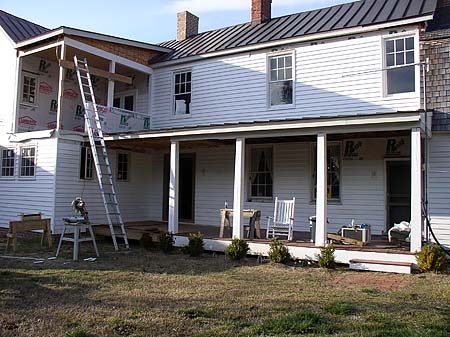
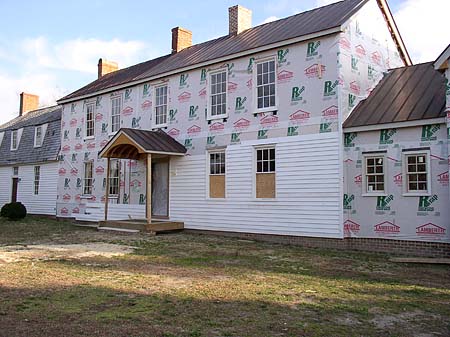
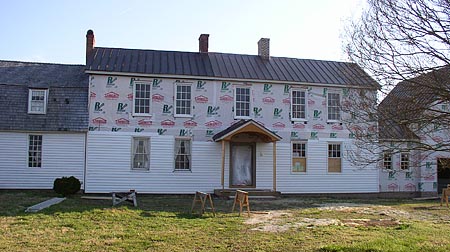
Siding progresses, slowly but surely.
The bottom siding is missing in the foreground until I can install the steps.
The insulation contractor is supposed to be back tomorrow to finish up. We'll see. -- Bill
"We've never done it that way before."
These seven words no longer have any power over me.
Time and again subcontractors have responded this way to my requests. At first the statement had its desired effect on me. I would think, "Well, gee...I don't have years of homebuilding experience...he does...he's never done it this way before...I must be asking for something that's highly unusual or just plain nuts."
I've wisened up though. It's a trick that they use to try to make their jobs easier. Don't fall for it.
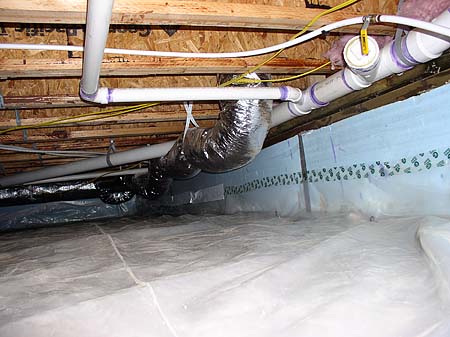
The insulation guys finally showed up today. (No, not yesterday as promised...but I won't get into that story.) One of their tasks was to put down the vapor barrier in the crawl space. When I noticed that they had no tape, I started asking questions.
"You didn't bring any tape?"
"No."
"Well, how are you going to tape the vapor barrier to the foam on the foundation walls?"
"We don't tape it to the walls, it just goes on the ground."
"Well, this is a conditioned crawl space. In order for it to be a closed system the vapor barrier needs to go up the foundation walls about ten inches and be taped."
"We've never done it that way before."
I didn't back down. Every schematic I have ever seen of a conditioned crawl space shows the vapor barrier running up the exterior wall and taped there. So I headed to the hardware store, picked up some tape, and they did the job right.
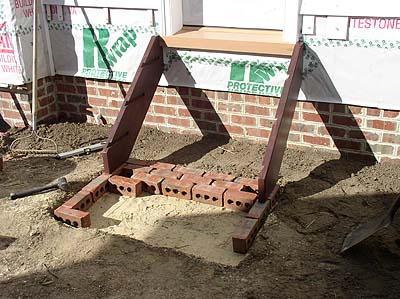
Most of my morning was consumed by the insulation guys. After they left I got to work on a small project that needed to be done before I can install the back door steps.
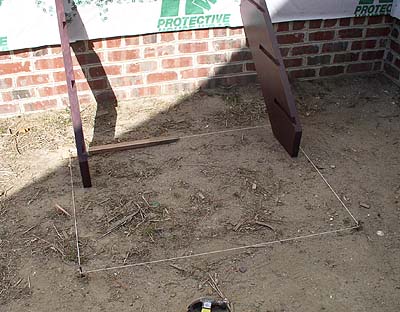
The steps need to sit on something other than the ground. I decided to make a brick pad and Gay suggested the good idea of setting the bricks in sand (instead of dirt or mortar) so that there would be good drainage, lessening the chances of the stair stringers/carriages standing in water. So I started by marking off the size of the pad. In hindsight, I'm probably going to wish that I had taken the pad all the way back to the foundation, instead of having to deal with whatever will want to grow back there under the steps. Oh well...
I dug out a hole and compacted the dirt.
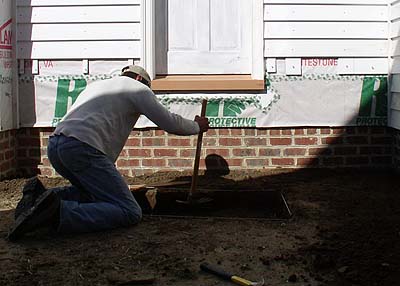
Then I put in a bed of sand (bringing it back up the level that I needed) and compacted it, leveled it side to side, and sloped it to the front for drainage. Then I started laying out my bricks. I used leftover bricks from the foundation. Since they have holes, I had to lay them on their sides, instead of face up.
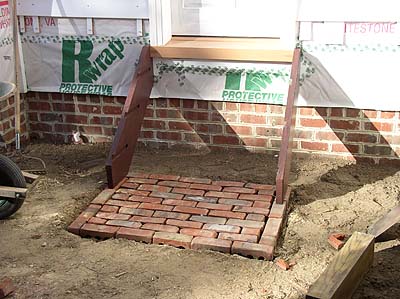
Then William got home from school, just in time to help sift the sand down between the bricks.
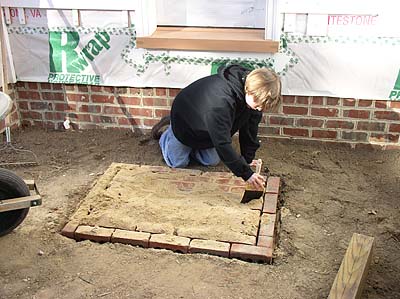
Because of the holes in the bricks, it tooks a lot of sand to fill all the cracks. We'll probably have to do this a couple more times as the sand continues to settle.
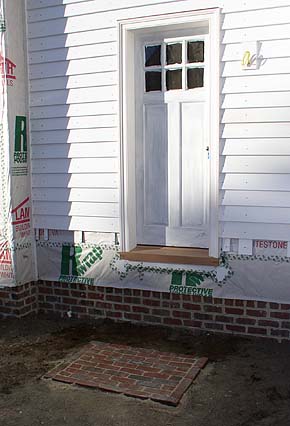
Now, we're ready to install the steps this weekend and finish up the siding on this wall.
We're really wishing that we hadn't let the mason pour the pad outside the garage door. Hate it. -- Bill
We passed our insulation inspection today. Only inspection left is the final, but we have a long way to go before then! -- Bill
We've been busy working on siding, even getting a start on the front of the house.
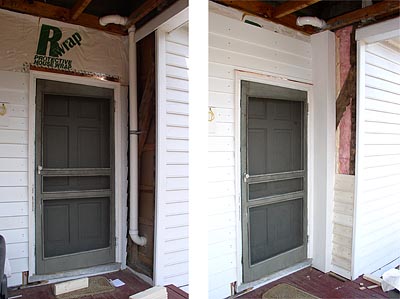
The back door steps are also finished.
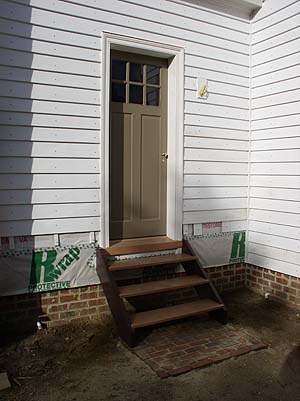
I didn't want to use a center stretcher, so I added a steel "L" to the underside of each tread. This stiffened up the 37-inch span nicely and they are set back far enough that they aren't visible.
I also put an adhesive waterproof membrane on the botoom of each stringer. Figured it couldn't hurt.
I'm a little concerned about code on these steps. (Aside from the fact that I need to add a rail.) I used the top of the threshhold to calculate the height of the top step. If the inspector uses the front edge of the sill, then that top step would be too short. Don't know if this is one of those things that it's better to ask about now, or ask foregiveness for later. Would be a real pain to change it once all the siding is done. To the right of the steps I need to vent the dryer and add an electrical outlet. Hate to mess up the nice period feel of this wall, but it's gotta be done.
The weatherman is promising temperatures in the 70s, starting tomorrow and going into next week! We should be able to really make some progress with the siding! I ordered scaffolding, which should be here in about two weeks. I also received my Little Green Suckers and started using them today. I'll share my opinion soon. -- Bill
Reason #73 why it's good to have kids.
You can lock them in the crawl space...
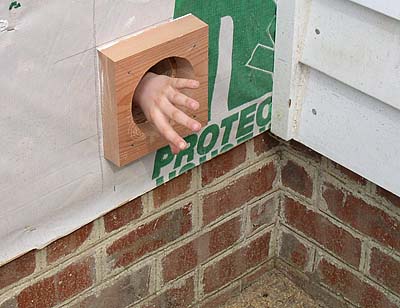
and have them install your dryer vent piping.

It's a good thing. -- Bill
Warning - This is a rage post. I have had it.
Our heat pump installation started 3-1/2 months ago. Three and a half months! For the last three weeks they haven't been here at all because they were waiting for me to drywall the area in the garage where the downstairs air handler was to go. (And I was slowed on this process because it was too cold in the garage for joint compound to cure, etc.) But there were still other parts of the install that they could have been working on during that time, but weren't. Like cutting through vents, finishing the first floor trunk line, installing two dampers and a bypass upstairs, etc. Communication in this company is awful. The installer doesn't know what the foreman knows who then doesn't know what the salesman knows. And meanwhile I have had to wait weeks and weeks to get answers from the salesman. Since the beginning of the process we have discussed the need for two dampers upstairs. The details are too cumbersome to go into here, but the bottom line is that they're still not installed because they were only ordered today after I finally blew up. At this point installing them involves undoing a fair amount of work that has already been done. It's just stupid.
For at least the third time today I had to walk the upstairs and point out where vents are to go because the installers didn't know. ("I didn't think this room was getting a vent.") Nobody ever writes anything down. In frustration, I called the supervisor and requested that he stop by. When he arrived I requested that he take notes so that we never have to go over any of this stuff again, so he went back to his truck to get a pad and pen. Along with the two installers we walked the vents for a fourth time. (Second time today.) We also detailed everything else remaining on the job...bypass, dampers, damper switch locations, etc. When he left, everybody seemed to be on the same page. And still the installers cut one of the vents on the wrong wall.
Plus, they made a mess of two others.
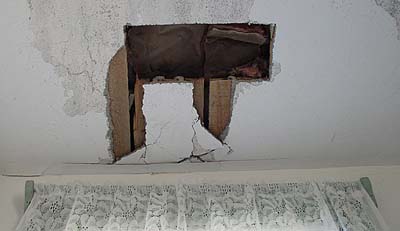
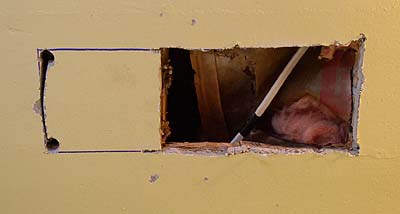
The photo above is of a small vent in the bathroom. They marked its location wrong and started cutting only to find that they were hitting a joist. Then they moved over to the correct location and knicked the jacket on a wire as they proceeded to cut there. I asked them to put some electrical tape on the wire, which they didn't.
So here's the score card. Today they cut 9 vent holes. 11% were in the wrong location and 22% were mangled cuts. A 33% screw up rate.
But there's more. Today they used my:
- 8-foot-ladder
- Extension cord and stinger
- Reciprocating saw (They had a battery-powered saw, but the battery wasn't charged.)
- Tape measure (They lost theirs.)
- Shop-Vac
It's not really the fact that they used my tools and equipment that bothered me. In fact, I offered them up freely, like when I found them standing around waiting for their battery to charge. What bugs me is that they arrived so unprepared to do the work. What would have happened if my tools weren't at hand?
They say that both units will be fired up by the end of the week. I think that after today they will be trying hard to meet that goal, if for no other reason than to get away from me.
I don't know how people have contractors in their houses doing renovation work while they live there. We have been very fortunate in that we have been able to largely keep contractors out of our living area this whole time. Today was a very disruptive exception to that. And the fact that they did such a miserable job, and will be back in here tomorrow, just makes it worse. Not to mention the day of work that Gay and I lost while trying to deal with all of this. -- Bill
Quote of the day from one of the HVAC installers in reference to the beadboard ceiling in the law office:
"Are you going to put drywall over that?"
I should cut him some slack, he's very young. But even at that age I would have appreciated that ceiling. Oh well. Happy Ides of March. -- Bill
It's been a while since I've updated the Journal on our progress with the siding. I've started to several times. But each time I've looked at the photos I took that day and thought, "Geez, it doesn't look like we've done anything." Siding installation just doesn't make for dramatic images.
The creek side shows the most progress because it's the south side of the house. It's warmer for us to work back there, so we definitely favor it.
I'm being held up on the upstairs screened porch because I am waiting for the roofer to come back and finish off the edges of the Duradek flooring. I put in another call to them today.
We've been working under the downstairs porch for the past couple days and that area is almost finished.
A few weeks ago we actually had a couple days when it was warm enough to work on the front of the house...meaning mostly that it was warm enough for caulking. But then things cooled down again and we headed back out back.
Some random comments on face nailing using old-style cut nails:
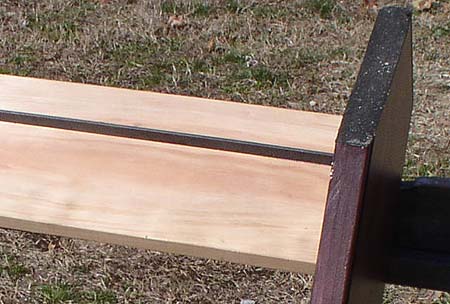
Even with the vertical grain cedar, we are still having to pre-drill every nail hole. The quartersawn cedar definitely splits less, but it still does split sometimes. And it's really the pits when you're driving the last nail in a 16-foot board and suddenly it splits. So we decided early on to not take the risk. I made a simple jig that helps out with this.
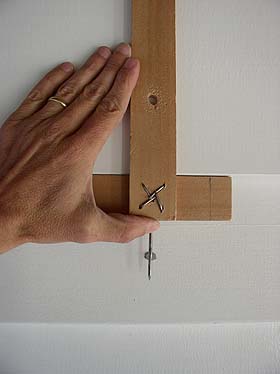
You just lap in onto the bottom of the siding board you're installing and line it up so that the nail at the bottom points to a nail in the piece of siding below. Then you drill your hole through the hole in the jig. Its purpose is two-fold. The nails are all spaced the same distance from the bottoms of the boards and the nails line up in a straight line all the way up the wall without weaving. We locate our studs at the bottom of the wall and then just roll with the jig after that. I call it the "holy jig." It's shaped like a cross and we use it to drill holes. Yeah. Good stuff.
You'd be suprised how many times a siding nail lands right on top of a sheathing nail. Then you have to decide what to do. Move the nail position up, down, left, right? Any of those choices now makes the nail out of line with all the rest. Not a problem most people have to deal with when blind nailing.
If stud positions shift at all between the first and second floors, so do your nail rows.
In the new construction our nail rows are sixteen inches apart. In the old areas they're much less uniform.
None of these are serious problems. Just issues that you will face should you decide to face nail your siding.
We approached the siding knowing that we wanted to vary the exposures some to help give the place an older look. We found that we don't need to worry about that. It happens all by itself. So our new approach is to just try to get everything as uniform as possible. No matter how hard we try, things just tend to drift a bit here and there, resulting in just the look we wanted. I'm started to think that the best way to get an old house look with new construction is to use correct, period-appropriate materials and then have them installed by moderately skilled amateurs. The resulting imperfections are just right. I have been very pleased that we've been able to round each corner and continue on without making any shifts.
Speaking of amateur. I finally had it today. I've been working a plastic speed square for years now. Finally broke down and bought a new metal one. Now I feel complete. The nicked up plastic one was flung immediately and gleefully into the dumpster.
I've been researching materials for the front and back porch floors lately. I keep wanting to believe in Tendura, really I do. But I've finally decided I don't have enough faith in it. Gay and I looked at an installation last year that looked really bad. (And it was actually a place that Tendura used to feature in their ads!) That cooled my jets on the product for a while. But secretly I kept wanting to believe. Maybe what we saw had just been improperly installed. Maybe it really is as good as they say. So once again I scoured their Web site and ordered their information kit. The deal killer this time is that their material has lots of caveats related to direct sunlight and heat. It's only supposed to be used on covered porches because it expands quite a bit in direct sunlight and can even buckle. Well, our back porch is covered but the outside half still gets LOTS of direct sunlight during the summer. And most porches are like that. No thanks. Sounds scary. While I'm at it, here's a Tendura pet peeve. In all of their material they promote their "Solids Collection" which they explain is "a color-through product available in battleship gray." One color. How can it be "solids" (plural) or a "collection" if there is only one product with only one color?? Needed to get that off my chest.
So I guess my porch floor options are vertical grain tongue & groove Douglas Fir, Phillipine Mahogany, or Redwood. Either way, I want to go with 1" thick boards this time.
I'm also trying to decide what to use for our front porch posts. I really think that they should match the square, tapered posts on the back porch, especially since you will be able to stand in the hall and see both porches. But I'm having a hard time visualizing these posts on the front of the house. They just don't seem formal enough. I could certainly trim out the tops of the posts to help dress them up some, but I'm not sure that will be enough to make it work. I need to make some sketches.
We think the installation of our heat pumps might be complete. But we're not sure. I was in Richmond yesteray and Gay said the installer left at the end of the day without saying anything to her. I know it was his intent to finish yesterday, and he wasn't back today, but it seems strange to finish a job and not officially give the customer the word. Strange...but not unusual. -- Bill
A while back I promised to post about my experience with the Little Green Sucker. This tool is designed to hold the ends of a siding board while you nail it into place, without the need for an assistant. The Little Green Sucker is priced reasonably considering the value it can potentially provide, just $89.95.
As you can see from their site, the Suckers run off of an air compressor...so you need to already have one or be willing to purchase one. You also need two air hoses and all the necessary connectors to run two hoses from your compressor. So the real costs can add up.
What I didn't realize reading their site is that the compressor motor runs full time while operating the Suckers. Makes sense since the demand for air to maintain the suction is full time. Very few compressor motors are designed to handle this kind of load. An article in this month's Fine Homebuilding ("Choosing An Air Compressor You Can Carry") says that most compressor motors are designed to run no more than 50% of the time and running them full time can burn them out quickly. So that's a problem. Not to mention the noise of a compressor roaring full-time while you're trying to work or shout measurements to your wife.
I also had some problems resulting from the design of the Suckers. If you look at the photos on their site you can see that each sucker has an adjustable rod that runs up through its center. This rod hooks onto the bottom of the siding board below to set your siding exposure. The top of the rod serves the dual purpose of helping to hold the new siding board in place. Because we are installing our siding with a relatively narrow exposure (5-3/8") the adjusted rod sticks up pretty far out of the top of the sucker...4-1/2" to be exact. This means that the new siding board needs to be slid straight down the wall from the top, dropping into place on top of the Suckers and behind the rods. In order for this to work your siding board needs to be cut to fit a little less snugly than I like. Also, old house work rarely involves straight edges. I find that I often have to put one end of a siding board in place and then flex out the center in order to tuck the other end into place. You can't do that with the rods in the way. I think that if you had a wider exposure and new construction this would be much less of a problem. If I should decide to use the Suckers again (taking my chances with the compressor motor) I will probably take a hacksaw and cut the rods shorter to better suit my particular needs.
Another simple feature that would greatly improve the product would be integrated bubble levels. Simply hooking the rod onto the piece of siding below doesn't guarantee that the top of the sucker is level, which can make your next piece of siding out of level.
Otherwise, the Suckers work as promised. They adhere well and remove easily. But in my opinion, The Little Green Sucker is still more of a gadget than a fully-perfected tool. A great idea trying to solve a very real problem...but with some significant shortcomings. The main problems being noise and wear and tear on your compressor. -- Bill
So apparently I'm a total nerd.
This past weekend we were in Richmond attending the Irish Festival on Church Hill and as we were walking past an antebellum rowhouse I merely observed, "Look, they have 5/4 tongue and groove porch boards, but where the floor rotted they replaced the old boards with 3/4", so it doesn't match."
To which William responded, "Are you going to be like this forever?"
Can't help it if I'm a little focused on porch flooring at the moment as I try to decide what we're going to use on our porches. Oh well.
When we ran the plumbing for William's bathroom we found that we had no way to get the drainpipe down inside the house. All of our options wound up dead-ending into the 18th century chimney base under the house. (Sadly, the chimney and fireplaces themselves are long gone.) The only option I could come up with was to bring the pipe out above the ceiling of the back porch and then down in the corner of the porch. (We couldn't come down in the adjacent wall because I didn't want the plumber drilling a 4" hole through the old timber downbrace.)
Finally this week I boxed the pipe in in order to finish siding under the porch.
It turned out better than I expected. The boxed-in corner is actually pretty close to the porch posts in mass, so it kinda feels like it's supposed to be there; like it's structural. I think once the porch ceiling is in (and the rest of the siding) it will just disappear.
We've also been taking advantage of warm weather to put up more siding on the north side of the house.
There's a real art to finessing siding to make things that aren't level appear to be level. Like the old windows on the left.
We have also been doing a fair amount of shimming in order to minimize some hills and valleys in the old walls. In the photo below the second shim from the left is almost 3/4" thick and the others get progressively thinner to taper the siding back to the corner board and window.
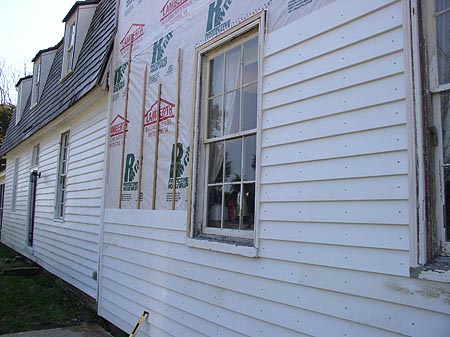
It's amazing how much you can level things out with siding if you take the time to do so. -- Bill
|